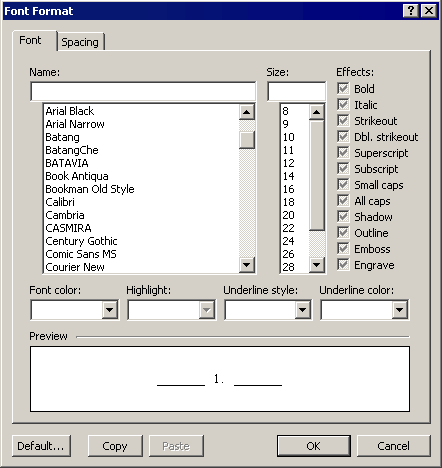
Normally the font formatting characteristics (font face, font size, bold, italic, etc) specified within a list format are not fully defined. For example, the default numbered lists in Atlantis have no predefined font formatting characteristics. If you open the Font Format dialog in connection to one of these default list formats, all the font format fields and boxes will either be blank or grayed out:

This is so because all bulleted or numbered items with unspecified font formatting options are automatically displayed according to the font properties of the corresponding paragraph end mark. Consequently, the look of bullets and numbers can be controlled by formatting the corresponding paragraph end marks differently.
Note that paragraph end marks are visible in the document window only when the View | Special Symbols mode is on. Paragraph end marks are displayed in the following way (using the so-called “pilcrow” character):

Let's take an example. The following list item is formatted in a standard way:
1. A list item.
The list format of this item includes no explicit font property (all the options in the Font Format dialog are blank or grayed out). Accordingly, the automatic number displayed by this list item uses the font format of the corresponding paragraph end mark.
So if we format this particular paragraph end mark with the red font color, the same color will be used to display the automatic list text of this item:

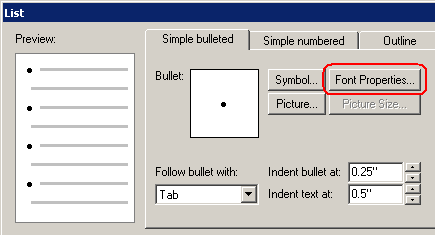
Now if you want to make some of the font characteristics of bullets or numbers independent of the formatting of the corresponding paragraph end marks, you need to specify these font characteristics explicitly. For this, you can use the Font Properties... button on the Simple bulleted panel:

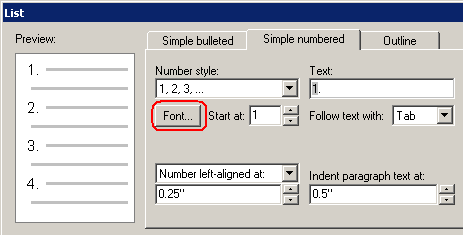
Or the Font... button on the Simple numbered panel:

Accordingly, you will find a Font Properties... button on the Outline panel whenever the level is bulleted, and a Font... button whenever the level is numbered.
So if you opened the Font Format dialog from the List dialog and specified “16 pt” for font size, the document bullets or numbers would always be displayed with that font size, whatever font size might be used by the corresponding paragraph end marks.
The Edit tab of the Tools | Options... dialog includes a list-related option Tab and Backspace change list levels. When this option is activated, items in outline lists can be promoted or demoted from the keyboard. Here is how this is done:
1. Place the caret at the beginning of the list item, immediately after its automatic list text.
Tip: You can first place the caret anywhere within the list item, then press the Home key. This will automatically move the caret to the beginning of the list item.
2. Press
a. either the Tab key to demote the item,
b. or the Backspace key to promote the item.
Note 1: Demoting or promoting style-controlled outline items with the Tab or Backspace key (or through any other means) is only possible when the next outline level is associated with a specific style. When no style is associated with the next up or down level, Atlantis simply has no way to determine which style should be applied to the demoted or promoted list item. Let's take an example. Let's suppose that you have associated only the first two levels of an outline list with styles (let's say, Heading 1 with Level 1, and Heading 2 with Level 2). In this case, you have left Level 3 through 9 with no style association. You will be able to demote a Heading 1 outline item to Level 2 by pressing the Tab key. You will also be able to promote a Heading 2 outline item to Level 1 by pressing the Backspace key. But you will not be able to demote or promote any other lower level item from that list since you did not associate any style with these lower levels. From Level 3 through 9, the Tab and Backspace keys will not change list levels.
Always be careful to associate a style with each level of an outline list that you might want to demote or promote with the Tab or Backspace key or through any other means.
Note 2: The Backspace key behaves differently with simple bulleted or numbered list items. If you place the caret at the beginning of a simple bulleted or numbered list item ( and immediately after its automatic list text), then press the Backspace key, you will remove all bulleting or numbering from the item. In other words, you will unlist the item.
Note 3: The Backspace key can also be used to unlist Level 1 items in outline lists, i.e. to remove any bullet or numbering from them.
Tip:
See also...